How do I create and publish a Slack bot?
A. Create a Microsoft Bot:
If you do not have a Microsoft account, go to https://login.live.com/ and sign up.
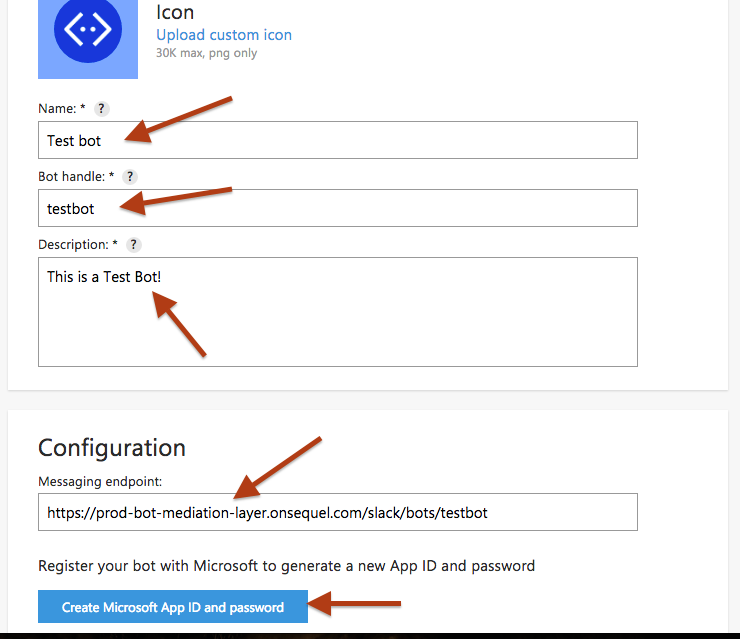
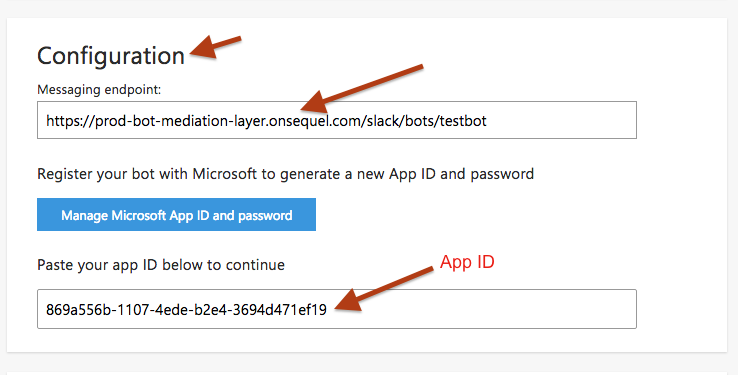
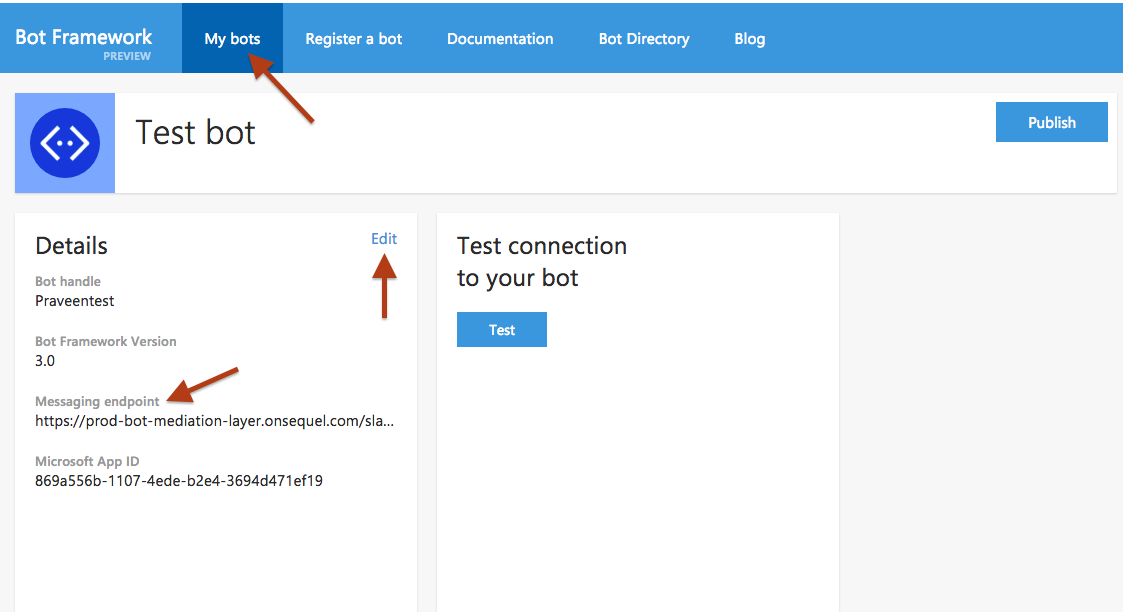
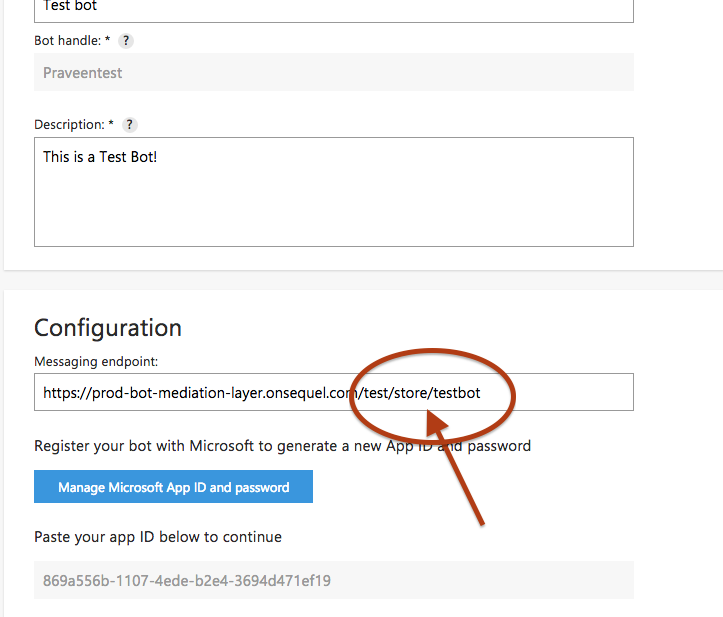
3. In the configuration section -> message endpoint will be https://prod-bot-mediation-layer.onsequel.com/slack/bots/botId (botID is "Bot handle")
4. Click on "Create Microsoft App ID and password" button
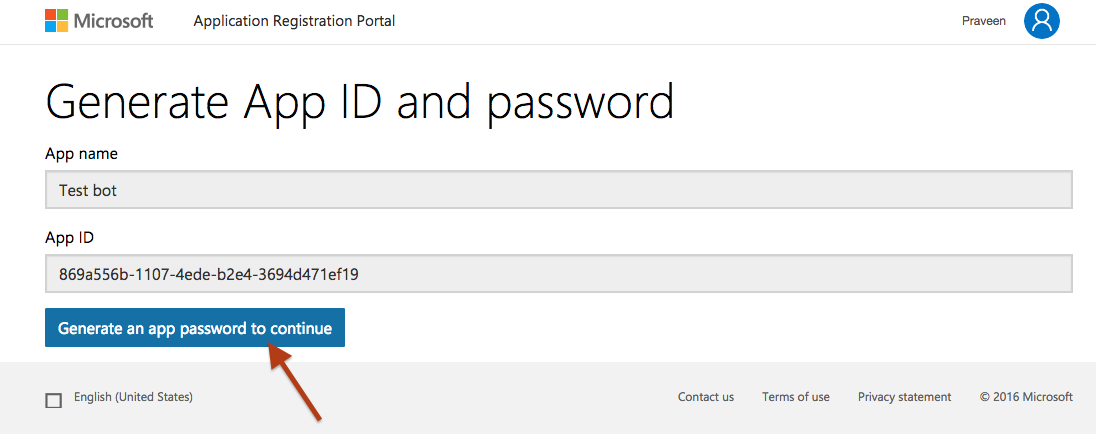
5. Click on "Generate an app password to continue" buttonA password is generated. Note down this App Password as shown in the below screenshot for future reference which is required to publish your bot
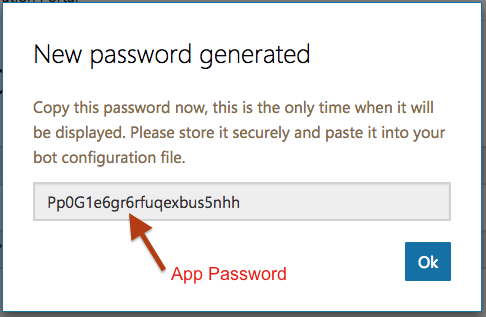
6. The App ID and Password are now generated and saved as shown in the below screenshot
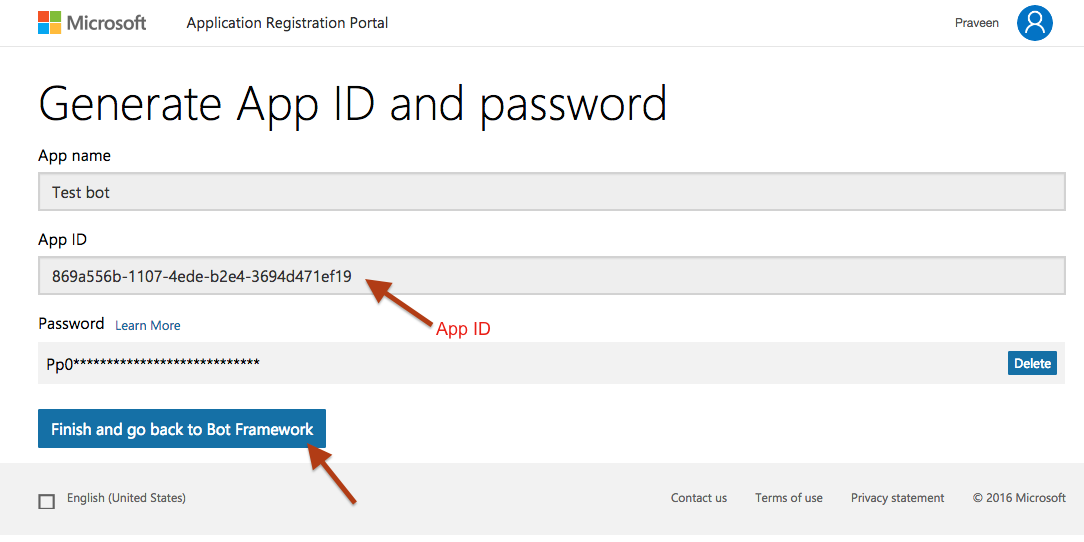
Note down the App ID for future reference which is required to publish your bot
============Retrieving BotId and Bot details ================
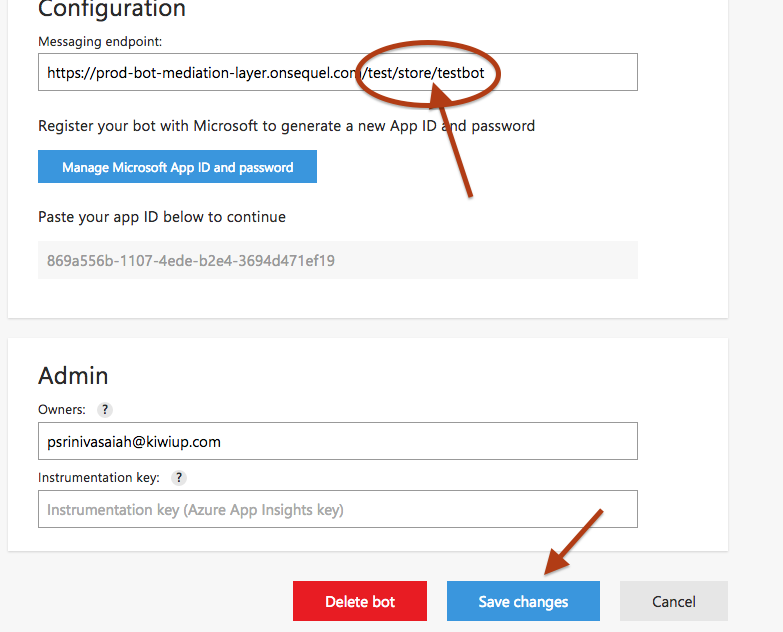
("slack" changed to "test" and "bots" changed to "store" in the above URL)
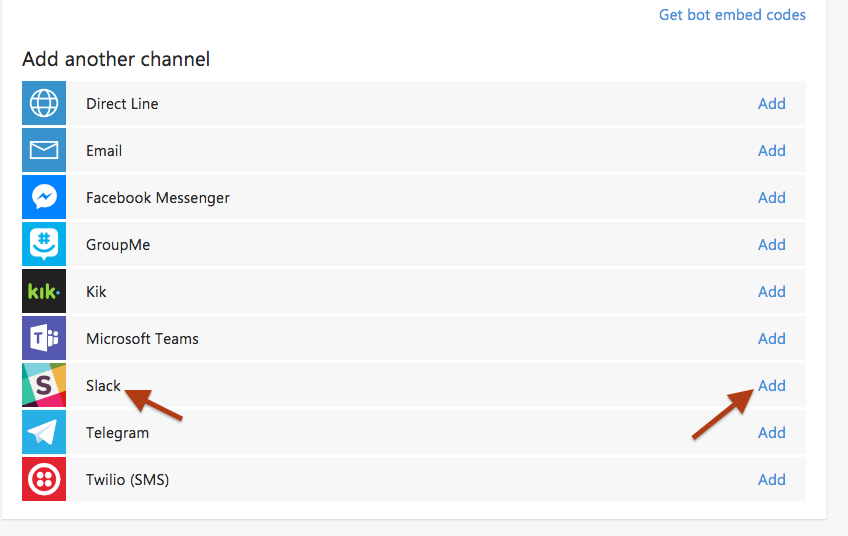
4. In your Botframework under "Add another Channel" section, click on "Add" for Slack channel
5. You are now redirected to Configure Slack section
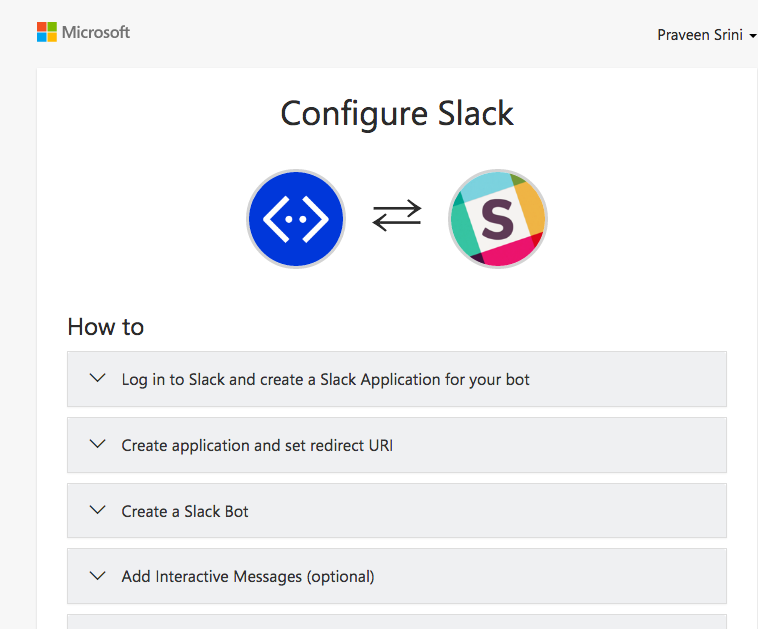
6. Choose the first option and click on the URL to log in to Slack and create a new App
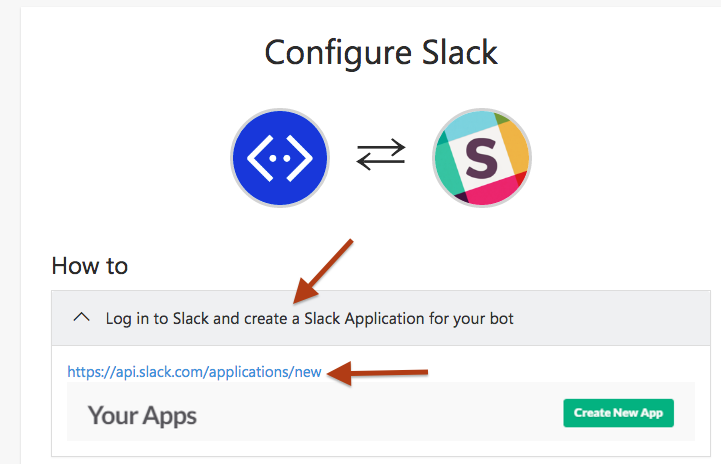
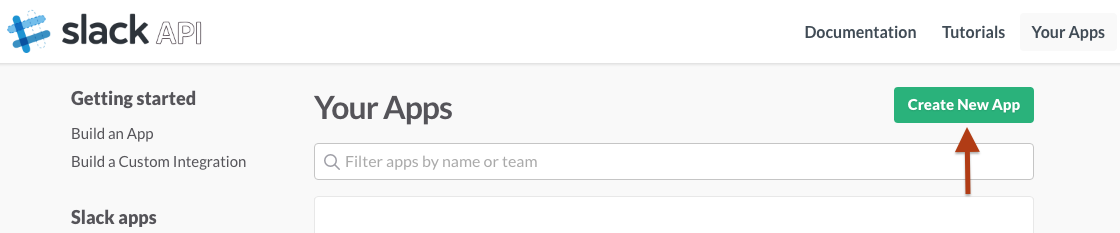
7. You are now redirected to Slack API. Click on "Create New App"
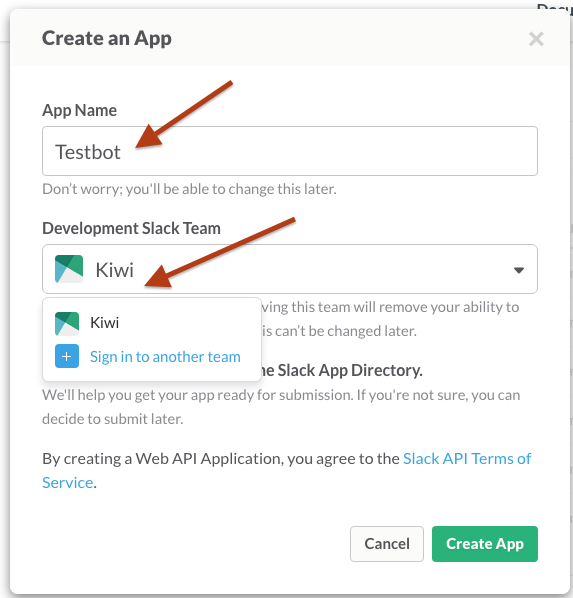
8. Choose a App Name (for e.g. Testbot)
9. If you are already a part of Slack Team, it will be shown in the drop down list of "Development Slack Team" (or) If you are not a part of any Slack Team, create or join a Slack Team using this URL - https://slack.com/
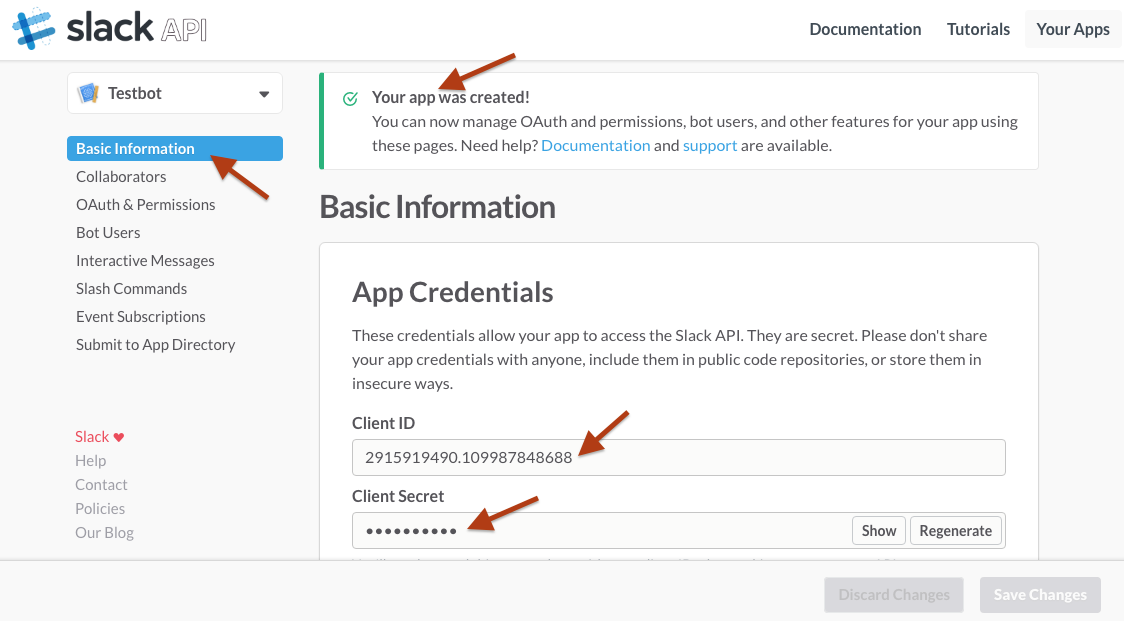
10. Once a new App is created, a Client ID and Client secret is generated
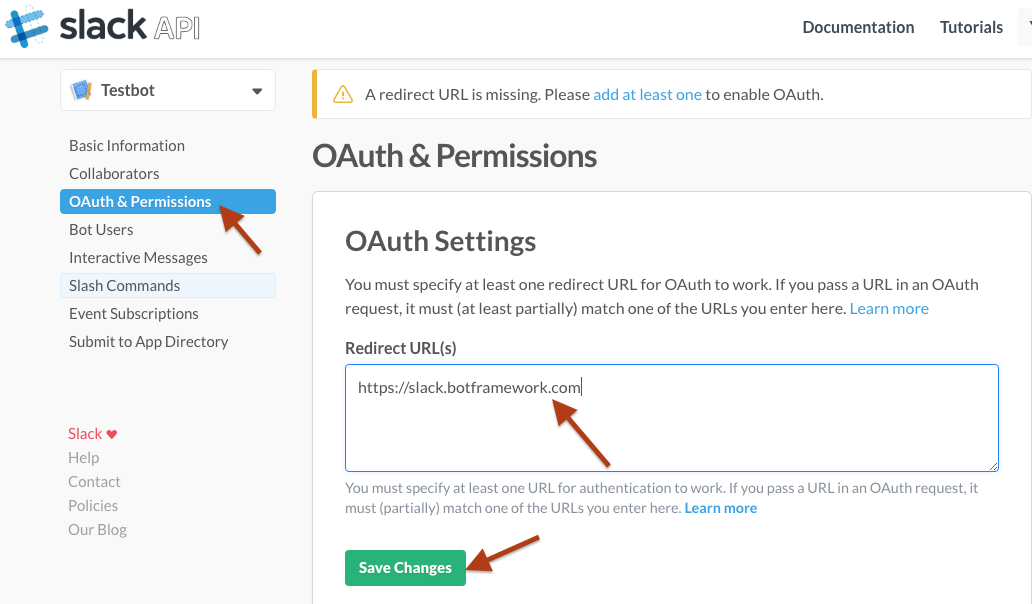
11. Choose "OAuth & Permissions" and enter the Redirect URL as https://slack.botframework.com and Save Changes
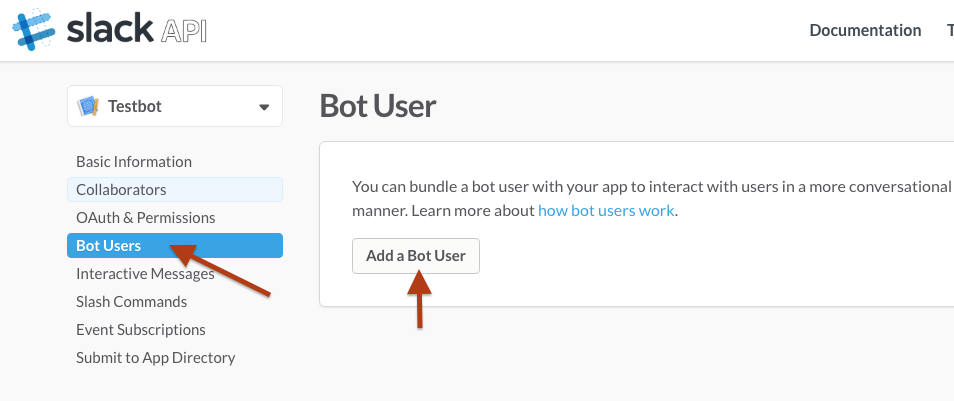
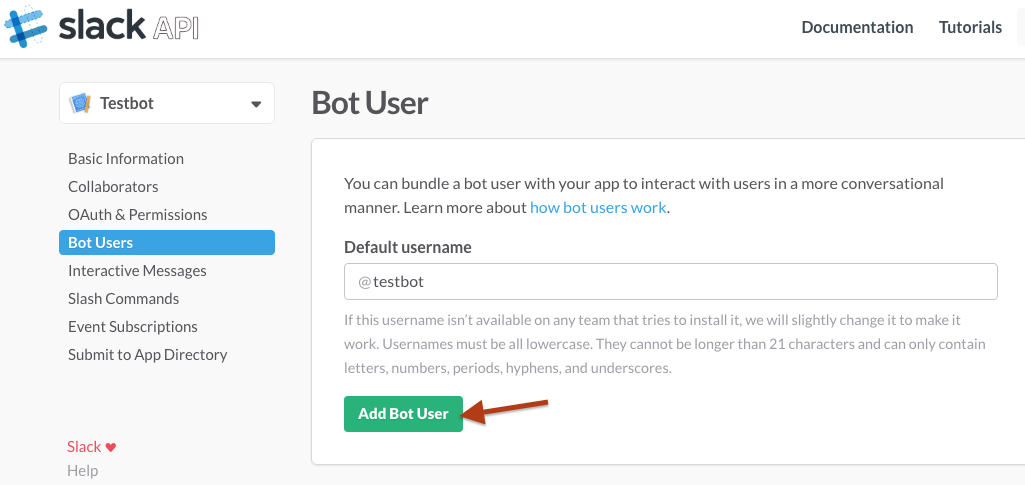
12. Choose "Bot Users" and click on "Add a Bot User" and you will see your bot username. Now, click on "Add Bot User" and Save Changes
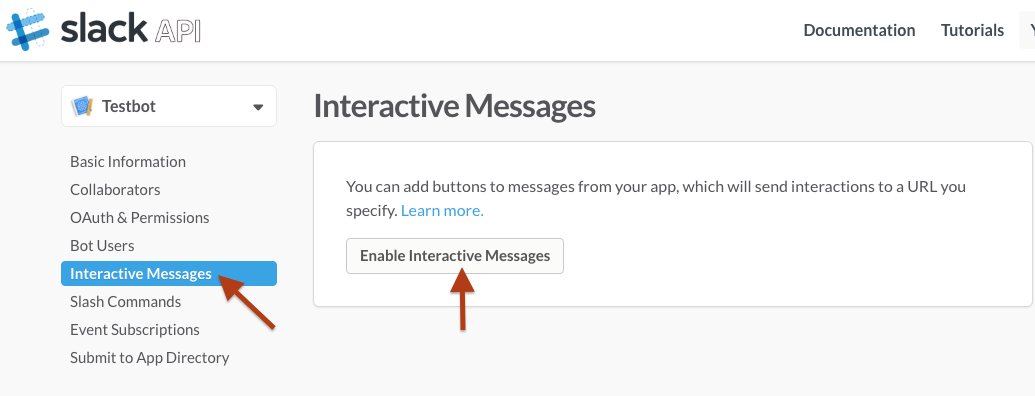
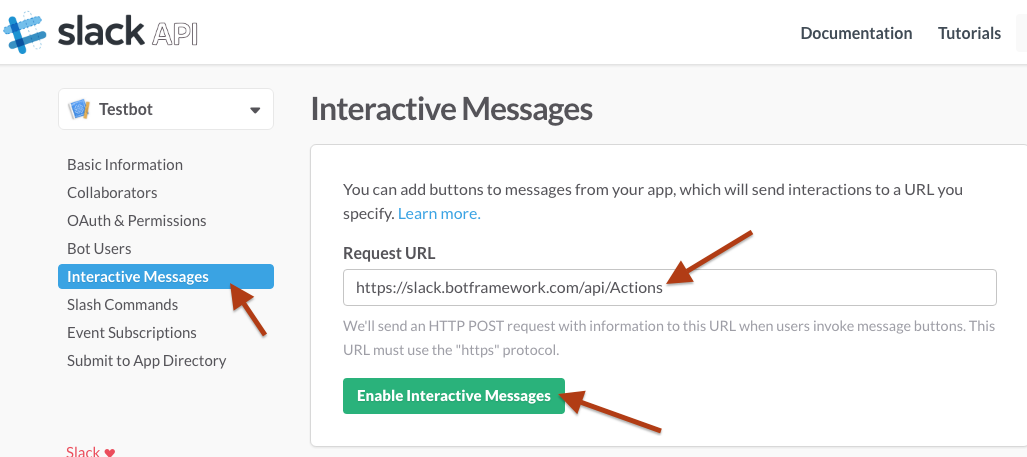
13. Choose "Interactive Messages" and click on "Enable Interactive Messages". Now, enter the URL https://slack.botframework.com/api/Actions and click on "Enable Interactive Messages" and Save Changes
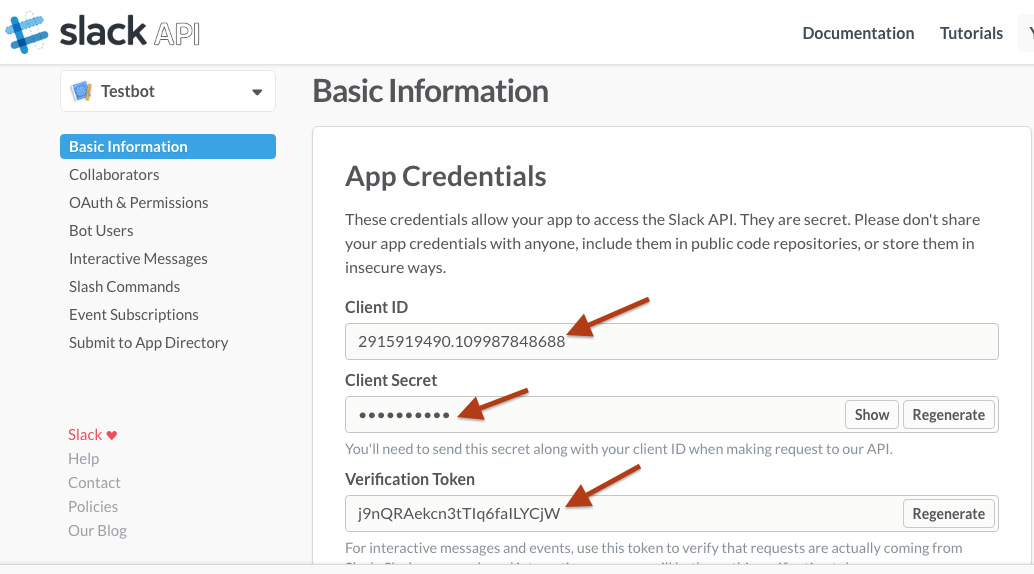
14. Choose "Basic Configuration" and make note of Client ID, Client Secret and Verification Token details
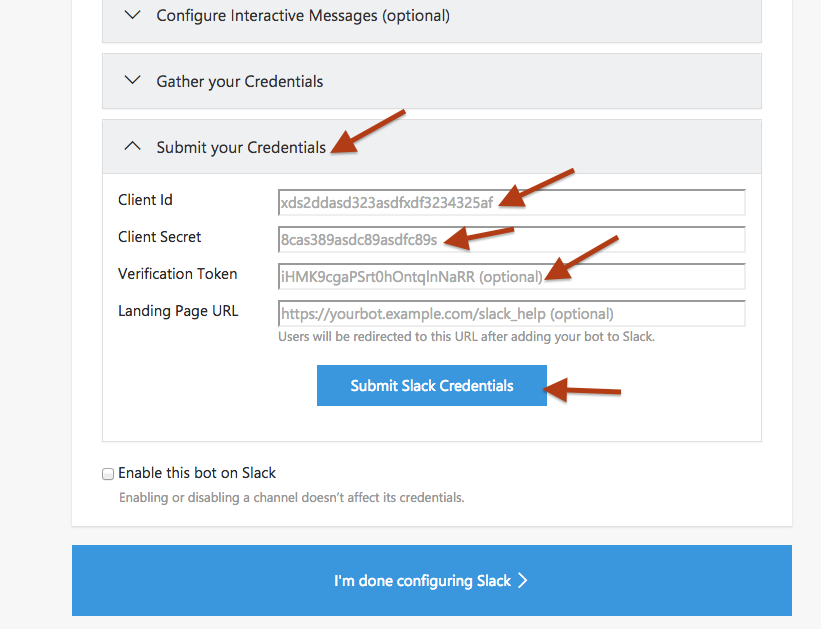
15. Now, go back to "Configure Slack" (as mentioned in #6). Under "Submit your Credentials", fill in the Client ID, Client Secret and Verification Token details
Click on "Submit Slack Credentials" button
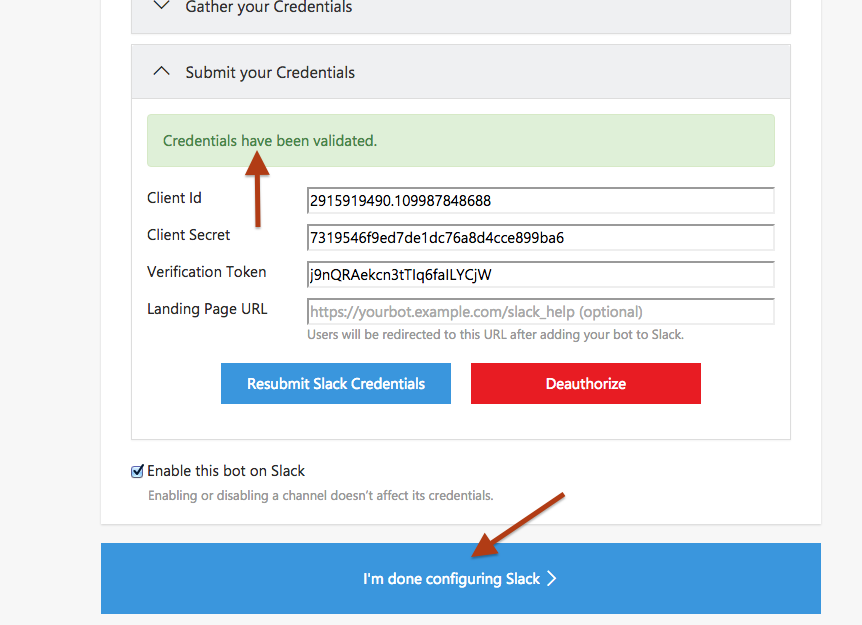
16. Now, click on "I'm done configuring Slack" button
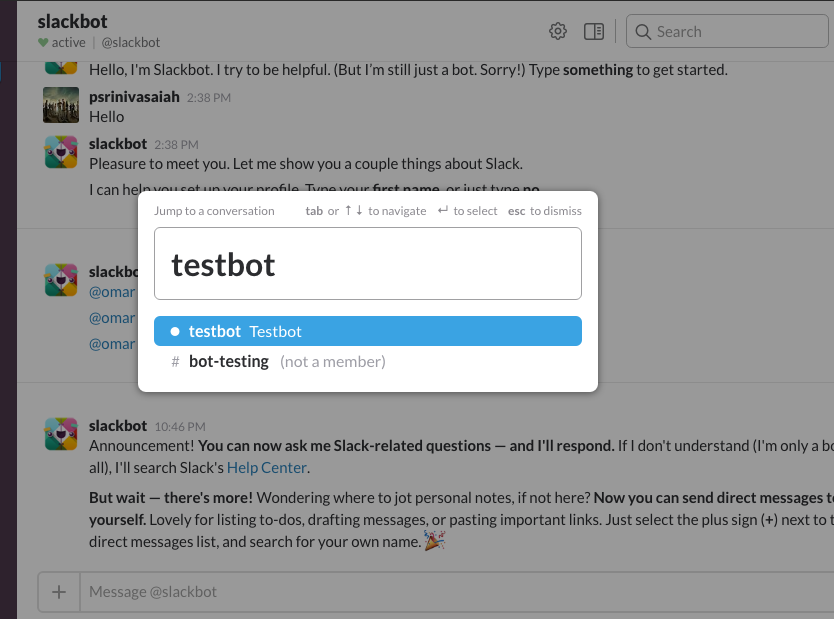
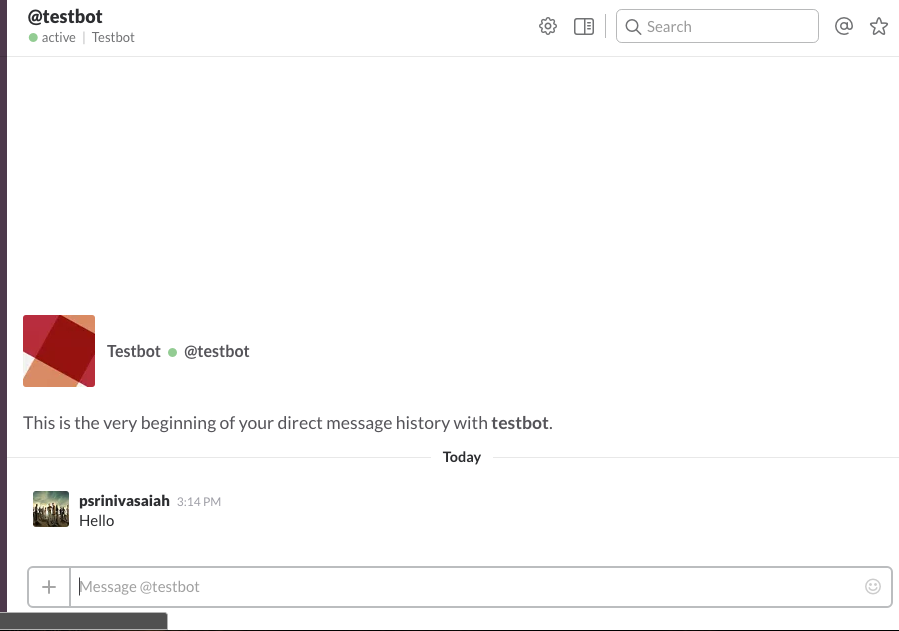
17. Open Slack, search for your bot and send a message
18. Now, hit this URL in your browser in a new tab
https://prod-bot-mediation-layer.onsequel.com/test/fetch/testbot
Note: testbot is a tag name. This name should be same as you've set in the Configuration section as shown in the below screenshot (in the below example, the tag name is "testbot")
So, the URL will be https://prod-bot-mediation-layer.onsequel.com/test/fetch/testbot
19. Once you've hit the above URL as mentioned in #18 above, you will receive a response as shown in the below screenshot

Make a note of the "recipient ID" and "ApiToken"
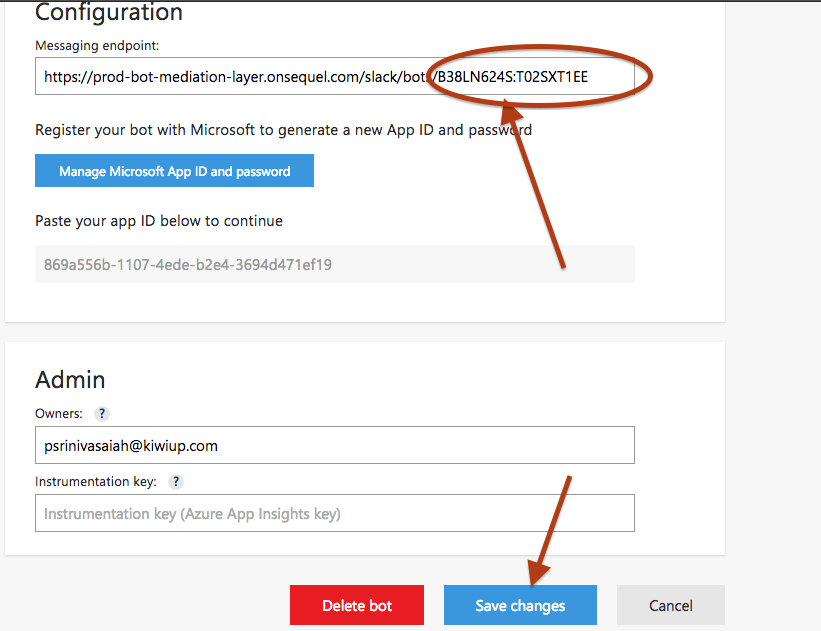
19. Now, go back to botframework and under "Configuration", edit the "Messaging endpoint" URL from https://prod-bot-mediation-layer.onsequel.com/test/store/testbot to https://prod-bot-mediation-layer.onsequel.com/slack/bots/recipientID
("test" is changed to "slack", "store" is changed to "bots" and "testbot" to "recipient ID" which is B38LN624S:T02SXT1EE)
Click on Save Changes
Publish your bot on Slack
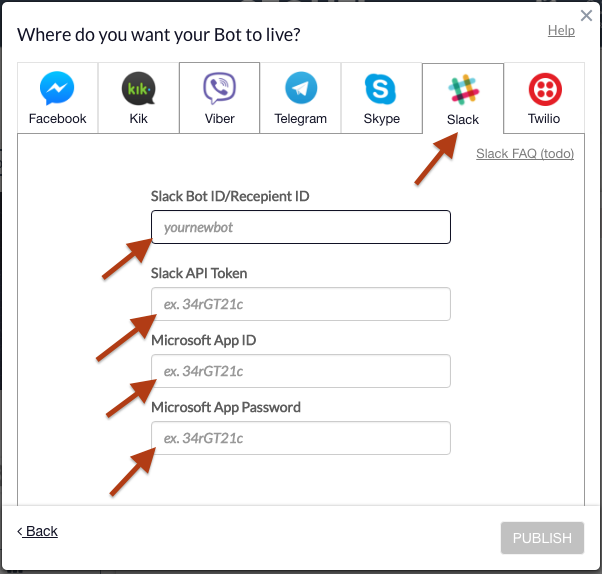
1. When you are ready to publish your bot at www.onsequel.com, choose "Slack" in the platform as shown in the below screenshot
2. Fill in the required details and click on "Publish"
a) Slack Bot ID/Recipient ID
b) Slack API Token
c) Microsoft App ID
d) Microsoft App Password
Yay! You're bot is now LIVE on Slack!
Log in to your Slack Team, search for your bot name and start chatting!
Customer support service by UserEcho